
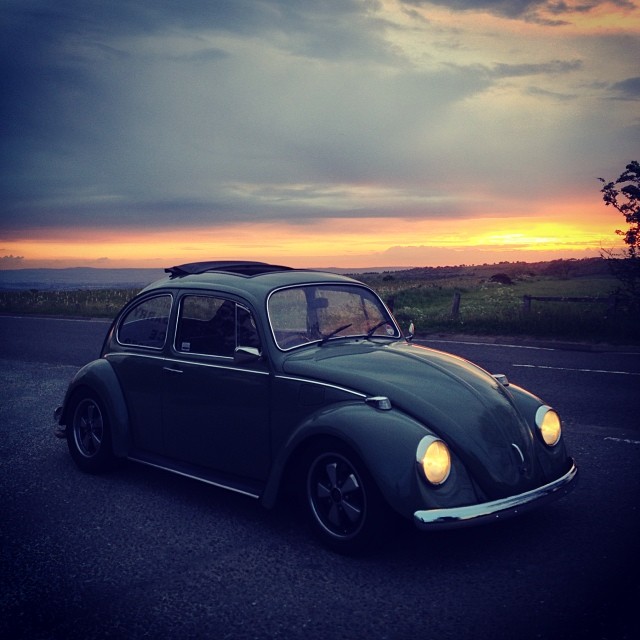
One long post chronicling the rebuild and restoration of a 1972 1200 model VW Beetle between June 2009 and August 2010. And a bit more in 2016/2017. Words mostly lifted from the Durham Dubbers/Flat4dubs forum, hence the conversational style of reportage. :p
1. Well as some of you may remember I had this on the road last summer, albeit briefly as the MOT expired a couple of months after the transformation and the rot was worse than I initially thought:


Looks pretty nice and went well with it’s 2007 stroker motor but it was decided not to be worth repairing (for me anyway) so I was on the lookout for a solid shell to transfer my shiny bits onto. Finding one was no easy task it has to be said! 😯
After looking at a couple of bugs no better than my existing one Paul Fraser discovered on VZi the perfect shell for me near Rainton Meadows. I went to check it out…a bargain at £250. Didn’t even have it in me to haggle. Think Paul was a bit gutted after seeing how good it was when we picked it up but I really appreciate him finding it! Couple of pics after unloading back home:
Body looks a bit of a mess but thankfully that is all surface rust from a previous owners bodywork attempts. Next the daunting moment of stripping the carpets out to discover epic amounts of rust, filler and mice nests….


2.
In reality, once stripped out…this is what I found:


A Bug that had been Ziebarted from the day it was bought and then every year since then. Really paid off because the pans, channels, inner wings, EVERYTHING basically is all original and untouched and is rock solid – very unsual for a UK ’70s bug – they normally seem to rot hellishly. Under the black waxy coating is the original factory paint. Which is very 70s. 😎


Good old Ziebart!!
Lovely uncut, unmolested dash with blanking plate. Mileage reads 69,000 approx which I’d say was correct looking at the condition:

Inner wing, solid and Red Oxided:

3.
Before I got carried away thinking all it needed is a coat of paint and an engine, and maybe some seats…the back end looks like this:

😥 😯 It was the victim of an unfinished Subaru conversion which appears to involve cutting out the entire bootfloor and a fair portion of the inner rear wings. Shocking really for such a solid bug but these things do happen and are thankfully easy enough to replace. Also needs a couple of small holes welding up in the heater channel closing plates but nothing major.
All the parts come with it to convert it to pre 67 panels and bits but I’m more keen on the late lookers. I may compromise with a ’67 styled upright headlight bug with a few earlier interior bits.

That’s it for now, more updates soon hopefully. 8)
4.
Bit of progress to report. Most of the panels needed arrived, including this:

Decided to go for a new (genuine VW) one as it seems a shame to bolt a crusty 2nd hand one off another car onto such an original bug. Welding will be all finished hopefully in the next week or so.
But before adding new metal, let’s take a chunk of old metal out. Take 1 sharpie marker, an angle grinder and a steady pair of hands. Measure thrice and get stuck in. The Webasto ragtop will be going on from my old one. Just the holes to drill for a test fit and then back out for painting:

External bodywork is also mostly flatted back externally ready for paint, thankfully no major dints or dings to sort either which is good.
5.
Small update, not had much done in recent weeks but hoping to get motivated!
Holes are all drilled for the ragtop frame and that’s been fettled and test fitted:

Now I know it fits perfectly it is back out ready for when the shell goes for painting – which will be soon I hope.
I’ve also removed the deadly rust trap that is the bonnet seal clip. Going to go with the Mexican style seal around the bonnet and use part of an existing standard one for the top lip on the scuttle panel. I went with the angle grinder (used carefully) option as I knew attempting to chisel the clip out would distort the metal. Turned out really smooth and clean in the end, then given a quick lashing of red oxide to keep any rust at bay until respray time:


6.
Been a while since I updated this thread, things have been moving quickly of late. Sadly didn’t hit my August 1st deadline but maybe Sept 1st – who knows? OK, here’s what’s been going on. Sometimes on a large project it’s nice to work on smaller parts of it and get a bit of satisfaction from actually finishing something! Decided I’m probably gonna use an earlier fuel tank that came with all the bits purely as I prefer the look of them, along with an earlier dash mounted fuel gauge. So a bit of time spent with an angle grinder wire brush attachment:
And a tin of gloss black aerosol I had lying around the garage I transformed this:

Into this:

Flatted back and polished but still needs a final going over with the G3 to shine a few bits and pieces out – decent enough though. Debating whether to polish the cap or paint it body colour…Also removed the surface rust from the bonnet and red oxided it to keep any rust at bay until it’s ready for paint:


Decided to check the condition of the floorpans and see if there was any nasties lurking under the original VW paint. Baremetalled:

And primered:

Only one tiny hole which is not bad for a ’72 UK bug. These will be getting the tarboard removed and a coat of gloss black once all the welding and bodywork has been done. More to follow. 😀
7.
Onto the welding that needed doing:
-Couple of heater channel closing plates
-Two small patches in the spare wheel well
-Small hole in floorpan
-Complete rear end rebuild with new inner wings, valance and engine side trays
You may also remember the lack of boot floor after a previous aborted Subaru conversion. Not any more:

Nicely welded in and seam sealed ready for paint. The Genuine VW panel was a pleasure to use, dropped straight in with no bother at all.
Closing plate, pic of the worst one:

Looks better after this photo was taken now the welds are cleaned up and after a bit of stonechip:

Back end getting there, both wings are now repaired, engine side trays welded in and near enough ready for paint. The valance needs modifying for my big stainless exhaust, those two holes welded up and a smaller one added in the centre:

Under bonnet area solid as anything, cleaned all the Zeibart off ready for paint, what an absolute twat of a job.

And that brings us pretty much up to date, bodywork was started today, entire dash and interior flatted back, primer on tomorrow hopefully and first lot of paint goes on over the weekend! Yeah! 8) 8) 8)
8.
Well today the interior was painted, along with the under bonnet area and engine bay. Really pleased with the colour, which is Agave Green, a ’56 to ’65 VW colour. My original bug was green (Turkis Metallic) but I always thought it a bit too modern for my liking and decided to go for a more subtle and classic colour whilst sticking with the old greeny hue. Photos don’t really do it justice, will get some outdoor ones with a proper camera when I can. For now though, quick pics:
Under Bonnet:

Engine bay, with potential for removable rear valance and twin carb/sparkplug inspection plates. These will have a removable plate fitted eventually:

Inside:


Dash:

Minor repairs on the outer bodywork and doors to be completed tomorrow, then primered and the rest painted early next week. Then just a case of whacking the motor in, MOT it and drive to York to go racing. Well, there’s a bit more to it than that like but y’knaa. 😆
9.
Some decent progress today. All the interior masked up, repairs to the outer bodywork done and then flatted back:

Then any bare metal bits or repairs primered up:

Guide coat put on after this photo was taken, it’s been left overnight to ensure the primer is hardened fully and then we’ll get it flatted and painted tomorrow. Good stuff.
10.
Well, sad to disappoint myself but today has been taken up with repairs and prep taking longer than hoped. And the paint we needed didn’t turn up, so the exterior hasn’t been painted. Never mind, some things are worth the wait…! So today’s progress consisted of…
Repairs to the doors and primering neccessary:


Painting the insides of the doors:

Painted the interior dash parts:

Inner wings prepped and stonechipped ready for topcoat:

 ’67 only decklid picked up from Richie down Boro way last night was prepped and minor repairs done ready for primer:

Also done was the repairs to the rear wings and they are in primer now ready for flatting and painting tomorrow. Been a long day today and will hopefully have some more pictures same time tomorrow…
11.
All painted outside, looks superb! 8) 8) 8) Should be returning home tomorrow if I can persuade P@aul Fraser to collect it, but here’s a few quick pics:


Inner wings and bootlid inside stonchipped and painted:

12.
Been busy with other things so not much chance of progress sadly. But there has been some. Car is now back home with me, masking tape & paper removed and the body flatted back ready for polishing:


Also got the outer ragtop frame slotted in, just need to trim the headliner and fit the inner frame to make it water tight.
Dash photo, hopefully rebuilt soon. Got the switches in which is a start! 😆

Also got the doors and decklid flatted and polished, lookin good. Closeup of door:

Over the next couple of days I’m hoping to get the doors refitted, windows in, body polished up and floorpan painted gloss black. Then get the ragtop properly fitted. 8)
13.
PROGRESS! 8)
Pans painted inside:

Body Polished up, looking mint:

And back three windows are in, couldn’t get the front done as the screen that came with the car is scratched to fuck. Need to nip and remove the one from my other ’72, hopefully its in decent nick…Once that’s in we can get the chrome trim in, none of this cal look rubber shite! 😆

Check the shine:


And sometimes its the smaller jobs that give you a bit of satisfaction. Bit of a scrub with the Cif:


14.
Lots of progress yesterday and this evening. I’ll get some pics and a writeup tomorrow when it’s light. In the meantime, new number plates arrived today. Fancied something a bit more special than the usual pressed black and silver plates so got these:

Really good quality and well impressed with them.
15.
Some pics of todays and yesterdays progress.
First up, sick of tripping over the back seat so decided to get the boot carpet and rear seats sorted:

Bit crinkled from where it’s been stored but that’s straightened out nicely as the day has wore on.
Doors on, front screen in, Chrome trim along the sides fitted!
Chrome trim put on all the window rubbers, a lot easier to do than I thought it would be. Just need to whack the chrome bits over the gaps once they’ve had a week or two to shrink down:

Ragtop frame bolted in properly:

Much better fit than on the other bug, used loads of sealant on that one but this on is a perfectly snug fit, no chance of leaks.

And the ragtop itself fitted at the front end, just need four holes drilling at the rear of the roof to secure it and that’ll be another job out the way:

Also got the wipers fitted but I reckon chrome or silver wiper arms would look better in all honesty…That’s all for now. 8)
16.
Few bits and pieces done over the last couple of days. Ragtop fitted and fettled, opens and closes very nicely. Open:

Closed:

Well I’m on a bit of a budget so couldn’t really stretch to a set of Hipacs, lovely though they are. So I made my own vented carb/sparkplug access panels for less than a fiver. Just call them LO-pacs. 😆 Take a couple of these:

Trim them to size, drill a couple of holes then add some adhesive weatherproof draught excluder to the back to make a nice seal. Et voila:

Bottom right screw isn’t tightened properly on the photo, sorted now for a nice snug fit. Should hopefully help with the airflow as I’m running a non vented ’67 decklid and probably no standoffs. Reckon I’ll paint them body colour mind, or black – bit more subtle.
And front wings in paint:

Along with the other remaining bits and pieces to go on the body. Don’t burn ya legs on the olympic flame there. 😆

Did a bit of work on the long bonnet I have today, hopefully that’ll be repaired and in primer over the weekend.
8)
17.
Old and the new:

Well the old car went on it’s final voyage down to Frasers yesterday afternoon using goggles due to lack of screen. 😆 😆
This is how it looked this morning, engine out and running gear stripped. Lookin a bit sad but never mind:


Engine is fitted into the new one, front beam is in and set up as is all the brakes. Hopefully get it running the morra. Happy days. 8)
18.
Things are taking a bit longer due to more work being needed than originally thought. It’s getting there though, even if Paul is getting a bit pissed off with working on it. 😆 All new brake lines, fuel lines and pump wired in, basically just a case of wiring the engine up now it’s in:

Front beam on and set up, reckon the Fuchs suit the paintwork nicely:

New narrowed and shortened chassis, it’ll be the in thing next year:

Doors are off and the rest is pretty much stripped now and ready for scrap. Sad but this pic below (and the completely bent frameforks) highlights how dangerous the car was:

😯 😯
19.
Back home now, took it out for a little spin – Henry St quarter mile. Nee good with the glovebox flapping in the wind though. 😳 😆 Drives nice though….very nice.
All the brakes are done, engine is in, wiring mostly sorted so it’s just a case of getting the interior in, wings, bonnet and decklid on, door glass in and a few other little bits n pieces. Then hopefully drive it before the salt comes out on the roads. Getting there though.


Dash coming together too:

8)
20.
Slowly but surely, starting to look a bit more like a car…


21.
Getting there:

Only thing that lets it down is the shit looking aerosol painted bonnet. Still waiting on a long bonnet which will be painted properly. Sooner rather than later I hope…
MOT booked for 11AM tomorrow, just the horn to wire up and then fingers crossed that’ll be it… 😯 😆
(It failed! Due to lack of exhaust backbox…but passed upon fitting it. Woop!)
22.
Phoned the DVLA today and a trip to Gosforth is needed to ensure tax exempt status but they can sort it out straight away apparently. Which is nice. Probably get it sorted tomorrow.
Been out and about today, this car feels a lot more er, safer than the last one, probably due to the fact that it’s not dropping to bits. Photo from behind:

Bumpers, or not bumpers…hmmmm.
DOES ANYONE HAVE A DECENT LONG BONNET?! 😯
23,
OK, well after a long winter (bloody long winter an all!) hibernation, and snapped steering column it’s time to get this thing finished properly!! Here it is after being fixed with a new column and lowered back to its original height just incase ya forgot what it looked like:


And the biggest let down of the car was the temporary bonnet, it’s been a task and a half to find a decent long bonnet suitable for this. An impossible task, infact. My paint man has created a long bonnet for me using the mint short bonnet from the car and then end of a not so mint long bonnet. With a bit of cutting and welding here and there it fits perfectly, you’ll not be able to tell the difference once it’s all finished. Here’s a pic of it with the bonnet tack welded up and trial fitted to the car. We christened it the franken-bonnet! 😆 😆

Also gave the original VW front bumper a quick polish, it’s come up mint – good German chrome! Remaining jobs to do off the top of me head:
– New seatbelts, the current ones are dangerously rubbish.
– Back end down an inch or so to counteract the positive camber.
– Rear Valance, front closing panel and glovebox painted.
– Centre caps fitted to the wheels
– Fit door seals
– Sort gaps in the tinware
– Remove front bumper for polish/paint inside, fit rear bumper.
– Swap the 36’s for 40’s, it could do with being quicker.
More to follow in the coming weeks… 😉
24.
Bonnet is fully welded and ground back inside and out now. Needs a little tweak on the left hand side where its nipped in slightly and a skim of filler over the join to sort it out. Should be all sorted in the next week or so:


Getting there though, other little bits are ready for paint too – rear valance, glovebox lid and the little circular panel that goes on the front valance. Also got some new seatbelts to go in, should feel a little bit safer!! Just hope it stays warm! 😆
25.
OK, all welding done. Repair on the bottom edge finished and tidied up, seam welded along the join, handle drilled and on the car for a trial fit:

Perfect. Back off the car, skim of filler:

Getting there, needs a couple of little tweaks tomorrow and will be ready for primer. Also got the other little bits and pieces in primer, back valance, front closing panel and glovebox lid/hinges:

And hopefully the last photo with the temporary bonnet on:

More tomorrow.
8)
26.
Cheers all! Just to confuse, it does have B&W plate on the back, I was just lazy when I fitted the front bumper for the MOT.

Although it scrapes on everything so I reckon it may be a case of keep the B&W front one on the back seat and ‘it just fell off this morning officer…’ 😆 😉
We has bonnet:


Well pleased with it! No inbetween pics as I’ve not had a chance to get down to the garage during the week but if you imagine a pic of a long bonnet in primer that’ll be sufficient! Needs a flatting and polishing, plus the inside stonechipping and painting. And then fit it! 8)
27.
Bonnet and all the bits ready to go on the car, Saturday will be that sorted hopefully. In the meantime, a Wayne Cole trick for you all, take one mouldy looking door card:

And add a bit of Kiwi shoe polish touch up:

Looked brand new once it had dried!
8) 😆
28.
Bonnet fitted:


Back valance on:

Not bad for a home made jobby! 😉 8)
Closeup:

29.
Few more pieces in the big old jigsaw…
Back end lowered a couple of splines, only downside is the front has raised up a little so that needs to go down another inch or so now! Also got the rear bumper polished up and fitted, all red rear lights on and a few other bits and pieces done. Also painted the Fram filter black as I was never keen on the orange, especially once I put the new red lenses on the back. Want a more ‘neutral’ look… Anyway, Pics!!
Lower:


Backend:

And also stuck a Bud vase in, always wanted one. 😳 😆

NEED to sort the centre cap situation and does anyone have a speedo like the one thats in – that works?
30.
2016! Revisited this thread looking for a picture of the Ziebart plugs – hoping to get some replacements sent over from the US.
Today I finally started a a lovely job I should’ve done 7 years ago, and that’s stripping the crusty underseal from the (still!) solid floorpans and repainting, red oxide to prime and then some Dinitrol on the go…
Bug is still going strong and looking as good as it did when it was painted. Bad news was an oil pump failure meant a little holiday to Daz Chandler’s for a complete engine strip down and rebuild but it’s alive again now. I figured 7/8 years of hassle free engine is pretty good going. I’ll probably update the thread in a bit once the underside is sorted. 😀


31.
Stripping the underside and repainting. May 2017 – a job I’d put off for almost 10 years but it had to be done. Stripping all of the old underseal off the floorpans and giving it a coat of Jotun Jotamax 2k yacht Primer. Not included are pics of me covered in rust and underseal, but here are a couple to prove it’s been done.
Up on stands:
UGH, the before:
Less UGH, the after stripping it by hand:
And after a coat of the 2K yacht primer. 
I’ll likely stonechip over this when I get a chance, but it’s done, thankfully.
Leave A Comment